
Flushing with Bulk Ink Delivery System
Flushing solution can be used to recover printheads that show signs of blockage. This is done by loading a flushing solution into the printhead assembly which can breakdown lodge particles and clean the nozzle paths in the printhead. It is also recommended to flush print heads when switching ink types.
This guide will explain how to flush out a single color printhead. This process does consume a fair amount of ink, so it is important to ensure that the system does not run out of ink during this process.
From the maintenance utility, print a nozzle check pattern to identify problem printheads. In the below picture note that the yellow printhead is not firing most of its nozzles.

2. Disconnect the ink bags from the bulk ink system.
3. Connect the flushing solution in place of the bulk bags.
4. In the maintenance utility navigate to the troubleshooting tab
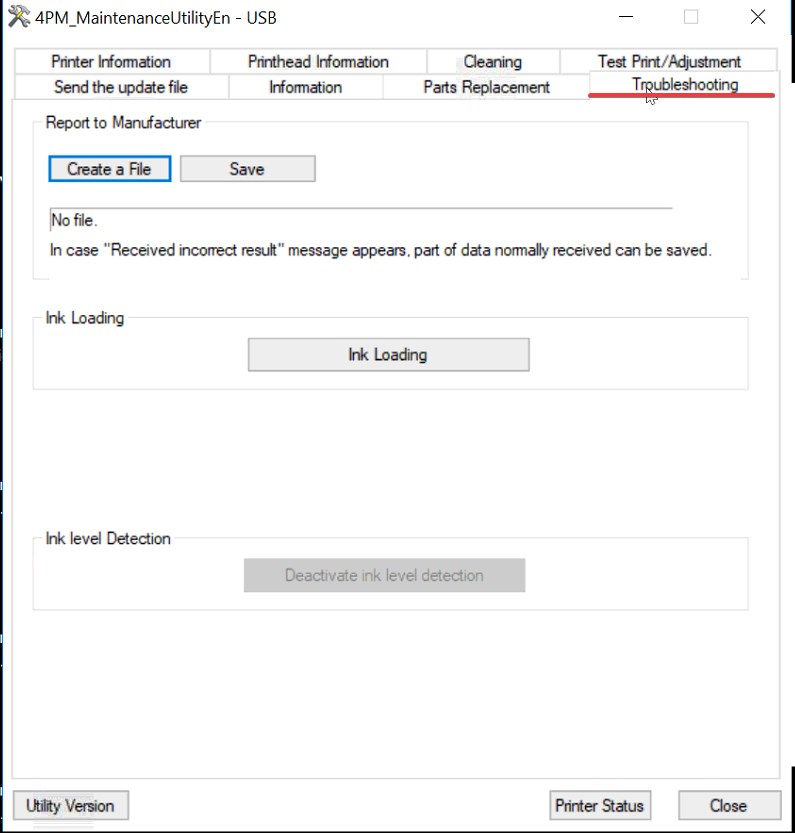
5. Press the "Ink Loading" Button

6. A dialog box will appear asking if you want to continue with ink loading - press yes to proceed

The system will begin its ink loading process which can take up to 30 minutes. During this process you can monitor the status in the printer status window. It is possible that a Fatal error can occur when using flushing solution instead of ink, this is normal and indicates the flushing solution has filled the printhead. The error usually occurs as the clear flushing solution cannot be detected by the printhead.
7. Once ink loading has been completed it is recommended to print a nozzle check pattern (if possible). If the color being flushing is still printing normally, it is recommended to run strong cleaning cycle (printing a nozzle check pattern after each cleaning cycle) with the flushing connected until the printer generates a fatal error or the color prints near 20% opacity similar to what is shown in the cyan below:

Postmark recommends for a full flush that 240ml of flushing solution should be cycled through each printhead.
8. Once flushing has been completed, disconnect the flushing solution and reconnect the ink that you were flushing.
9. If you had a fatal error during the flushing procedure, Power cycle the printer. If an error occurred during the flushing process, the printer should begin the ink loaded process automatically.
10. Navigate to the troubleshooting tab of the maintenance utility, and click the ink loading button once again to load ink.

11. Once ink loading is complete and the printer status shows online / ready, print another nozzle check pattern to verify results of flushing the printhead.
If the color density looks light it is recommended to run a strong cleaning cycle on the printer. If the density still looks light after a strong cleaning, run another ink loading cycle to fully evacuate any flushing solution that may be in the printhead .
