
Installing ICC Profiles in Xitron Navigator
Introduction
This guide will explain how to setup and install an ICC profile for the PM-417 and PM-836 Printheads in teh Xitron Maestro (Navigator) software.
ICC profiles help ensure that colors are printing accurately. An ICC profile is generated by printing out thousands of small color swatches and scanning them using a spectrophotometer. After scanning, a profile will be generated. Profiles are specific to resolution, ink type, and substrate.
Downloading ICC Profiles
All ICC profiles that have been genarated for the PM-417 and PM-836 can be downloaed at the following link:
There are two different files required for an ICC Profile. One is the linearization file which usually has "SG" in the file name. The other file is the actual ICC profile which is a *.icm file.
Installation
After downloading the correct ICC profiles, copy the linearization file (SG) to the following directory depending on which printhead you have.
Dye 4" printer (PM-417D)
C:\Navigator\Navigator 11.0r3\SW\Devices\CFT\Profiles\CMYK\PM-200a
Pigment 4" printer (PM-417P)
C:\Navigator\Navigator 11.0r3\SW\Devices\CFT\Profiles\CMYK\PM-200z
Dye 8" printer (PM-836D)
C:\Navigator\Navigator 11.0r3\SW\Devices\CFT\Profiles\CMYK\PM-210a
Dye 8" printer (PM-836P)
C:\Navigator\Navigator 11.0r3\SW\Devices\CFT\Profiles\CMYK\PM-210z
If the folder for your printer is not their, make a new folder in that directory and copy the linearization file into that folder.
NOTE: Do not copy the *.icm file to the Profiles directory - you will need to store this file in a different place on your computer. We recommend making a folder in C:/Navigator called profiles.
Next, in the Xitron RIP, select Install ICC Profile from the Color menu bar as shown in figure 1.

Figure 1.
A windows browser dialog will appear. Navigate to the ICC profile (.ICM file) that was downloaded for the profile that you want to install.
An example of this type of file would be "Pigment Copy Paper 600.icm"
After selecting the file, another window will come up to finalize the installation of the profile. Check the box "Device profile" and select the appropriate printer type in the "For Device" drop down menu.
Dye 4" printer (PM-417D)
PM-200a
Pigment 4" printer (PM-417P)
PM-200z
Dye 8" printer (PM-836D)
PM-210a
Dye 8" printer (PM-836P)
PM-210z
Under the linear Calibration Form, you will need to choose the corresponding linearization file (SG) that was copied into the profiles directory earlier. For example, SG_Pigment Copy Paper 600 would be picked if you were installing a 600 DPI profile for Pigment Copy Paper.
Uncheck the box "resample on install" - a sample of what the settings should look like is shown in figure 2

Once your settings are correct, click Install.
After the ICC profile has been installed with its corresponding linearization file, we will need to set up a new color management setting that can be selected from the Xitron software.
In The Xitron Rip select Color Setup Manger from the Color menu as shown in figure 3:

Figure 3
Choose your printer type (as explained above) under the device drop down:

Figure 4
Click the button "New 'ColorPro" Setup
A new Color Setup Dialog will come up which allows for full customization of the color profile. For most applications, we only need to modify the following settings
1. Under the CMYK Data dropdown box, choose "GRACol (CGATS TR006)
2. Under the RGB Data dropdown box, choose sRGB
3. Click the checkbox "treat Spot colors as CMYK
4. Under the Output Profile Drop down box, select the ICC profile that you have just installed
5. Under the main Intent dropdown box, selected the option (-> ICC colormetric)
6. Under the Color Adjustments drop down box, change the setting from Faster to Better

Figure 5
After the correct settings have been made, click the button "Save As.." in the lower right corner of the New Color Setup window. Enter a name for your color calibration; this name will appear as an option in your workflows. It is usually recommend to include the resolution in the name.
Installation of the ICC profile is complete. To access the newly installed profile, open up your direct output settings in a workflow. Click the button "refresh configs" to load the newly installed profile
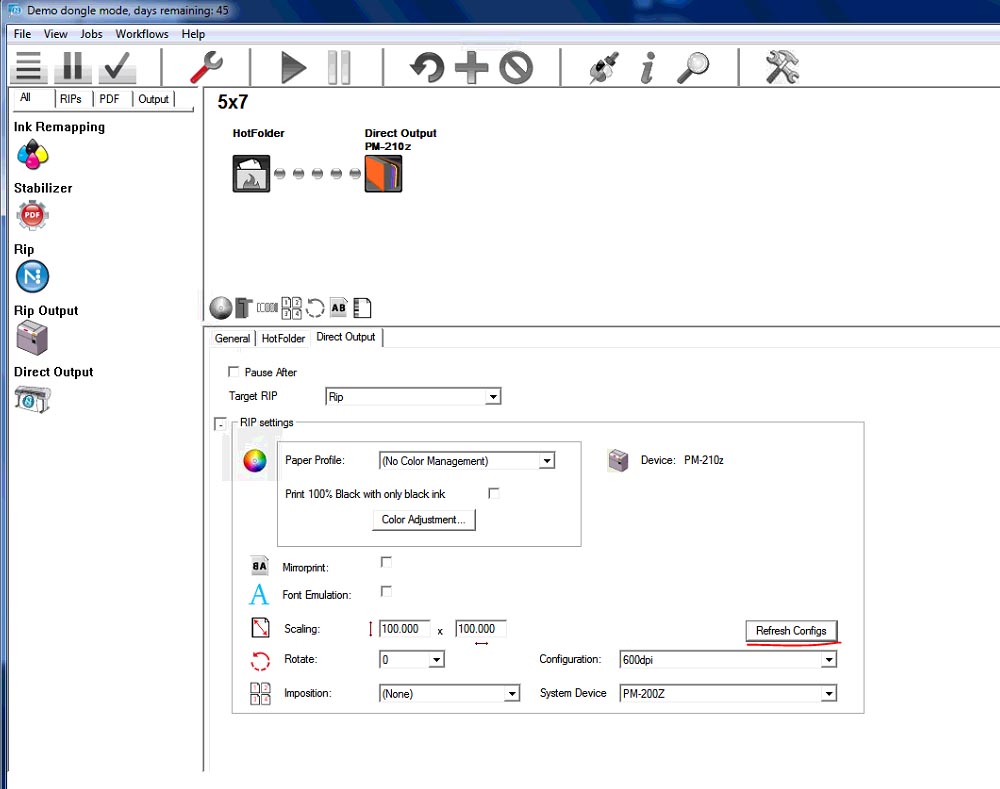
Under paper profile, the newly installed profile should be available for selection:

The following video can be used as reference on downloading and installing ICC Profiles